Follow Me On Social Media!
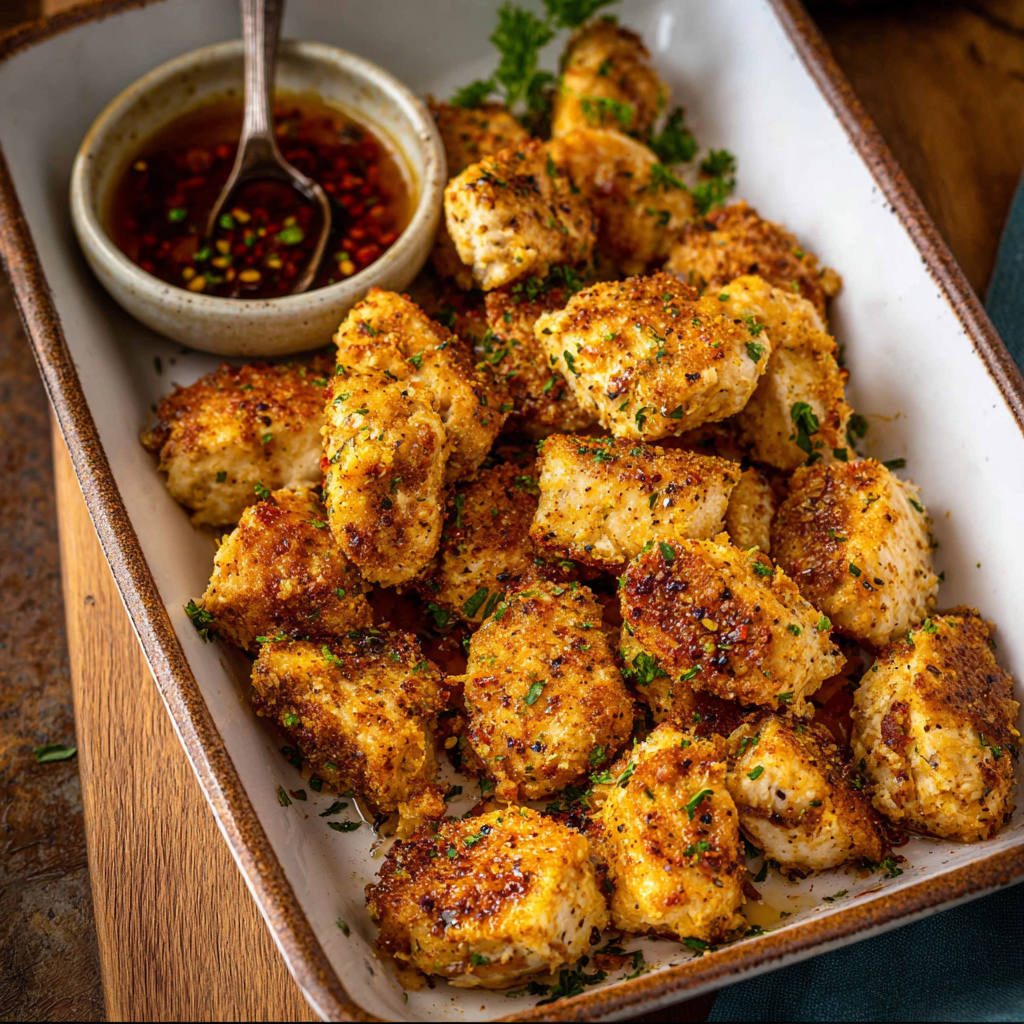
The Culinary Architect: Cowboy Chicken Bites
The Gastronomic Architecture: The “Lipid-Smoke” Crust
In the hierarchy of high-protein snacks, Cowboy Chicken Bites represent a sophisticated study in Adhesive Seasoning and Atmospheric Dehydration. The technical challenge of the “Cowboy” profile is achieving a “Ranch-Barbecue” fusion: a smoky, savory crust that adheres to the protein without a heavy breading. By utilizing a Bacon-Fat Bind, you create a high-affinity surface for the dry rub to “lock” onto the muscle fibers, while providing a sacrificial lipid layer that facilitates a crisp, golden-brown finish in high-heat environments.
The “irresistibility” factor is driven by the Cumin-Capsaicin-Smoke Triad: the earthy depth of cumin, the mild heat of chili powder, and the guaiacol from smoked paprika mimic the flavor profile of an open-flame campfire cookout.
Essential Mise en Place: Technical Specs
To achieve a restaurant-grade “snap” and succulent center, the uniform surface area of the protein and the “Bark-Formation” are the most critical factors.
The Foundation (The Protein)
- Chicken Thighs (600g): Technical Requirement: Cut into 2.5cm “bite-sized” cubes. Thighs are preferred over breasts for their higher intramuscular fat, which resists the “Dry-Out Point” during the high-heat roasting or air-frying phase.
- The “Cowboy” Dry Rub: A blend of brown sugar (for caramelization), smoked paprika, garlic powder, onion powder, and a hint of cayenne.
The “Saddle” Matrix (The Bind & Flavor)
- Bacon Grease or Melted Butter (2 tbsp): Acts as the adhesive for the dry rub and provides a savory “Animal-Fat” depth.
- Barbecue Sauce (for dipping): A high-fructose, high-acid sauce to contrast the smoky rub.
- Fresh Chives: To provide a “high-frequency” herbal finish.
The Masterclass: Step-by-Step Culinary Execution
Phase 1: The “Surface-Area” Prep
Pat the chicken cubes bone-dry with a paper towel. Technical Requirement: Moisture is the enemy of the “Cowboy Bark.” Any residual water will create steam, resulting in “boiled” chicken rather than “roasted” bites.
Phase 2: The “Lipid-Rub” Adhesion
Toss the chicken cubes in the bacon grease first, then sprinkle the dry rub over them. Expert Tip: Using the “Shake-in-a-Bag” method ensures a homogeneous coating of seasoning on every millimeter of the chicken, maximizing the flavor-to-protein ratio.
Phase 3: The “Radiant-Heat” Blast
Place the bites on a wire rack set over a baking sheet. Bake at 220°C (425°F) or air-fry at 200°C (400°F) for 12–15 minutes. Technical Requirement: The wire rack allows for 360-degree air circulation, preventing a “soggy bottom” and ensuring the Maillard reaction occurs on all surfaces simultaneously.
Phase 4: The “Caramelization” Glaze
For the final 2 minutes, brush a thin layer of BBQ sauce over the bites and return to the heat. This creates a “Sticky-Tack” finish that locks in the juices and provides a glossy, professional aesthetic.
Common Technical Pitfalls to Avoid
- The “Soggy” Bite: Caused by overcrowding the pan. If the chicken pieces touch, they will trap steam between them. Ensure at least 1cm of clearance between each bite.
- The “Bitter” Bark: Occurs if the brown sugar in the rub burns. If your oven runs hot, reduce the temperature to 200°C for the final glaze phase.
- Tough Texture: Caused by overcooking. Use an instant-read thermometer to pull the chicken once it hits 74°C.
Frequently Asked Questions (Q&A)
| Question | Expert Answer |
|---|---|
| Can I wrap them in bacon? | Yes. This creates “Texas Rattlesnake Bites.” Wrap each cube in a half-slice of bacon before seasoning; extend cook time by 5 minutes. |
| Why use brown sugar? | It lowers the “Caramelization Threshold,” helping the chicken develop a dark, rich color before the meat dries out. |
| What is the best dip? | A Chipotle-Ranch provides a cooling lactic-acid base with a secondary smoky heat that complements the dry rub. |