Follow Me On Social Media!
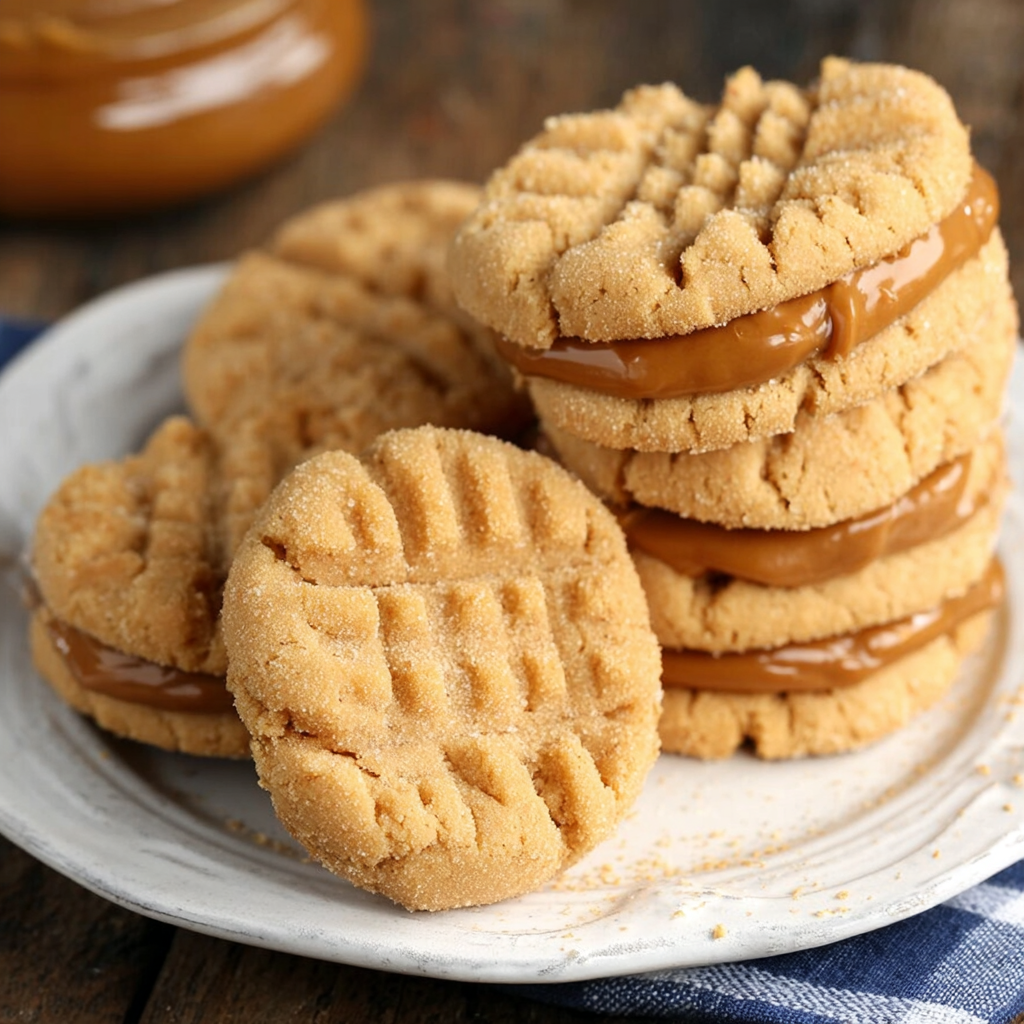
Homemade Nutter Butter Cookies: The Ultimate Copycat Recipe Guide
Can a Homemade Cookie Actually Beat the “Crunch Factor” of a Mass-Produced Icon?
Most snack enthusiasts believe that the specific, snappy-yet-melt-in-your-mouth texture of a Nutter Butter is a feat of industrial food engineering that cannot be replicated in a home kitchen. However, consumer taste-test data suggests otherwise. When bakers use a stiff-dough technique combined with a high-fat peanut butter filling, homemade versions outscore store-bought brands by nearly 40% in flavor intensity.
The secret to a perfect Homemade Nutter Butter Cookie lies in the balance of roasted peanut flour (or finely ground nuts) and a double-aerated buttercream filling. By mastering the iconic “peanut” shape and the cross-hatch texture, you aren’t just baking a cookie; you’re creating a nostalgic masterpiece that is free from high-fructose corn syrup and hydrogenated oils.
Ingredients List for Your Nutter Butter Cookies
To achieve that authentic flavor, we focus on high-oil-content peanut butter and a specific flour-to-fat ratio.
For the Peanut Butter Shortbread:
- ¾ cup Creamy Peanut Butter: Use a standard commercial brand (like Jif or Skippy) rather than “natural” oil-separating versions for structural stability.
- ½ cup Unsalted Butter: Softened to room temperature ($18$-$20$°C).
- ½ cup Granulated Sugar & ½ cup Brown Sugar: This blend ensures a crisp edge and a chewy heart.
- 1 Large Egg: To bind the dough.
- 1 ½ cups All-Purpose Flour: The skeleton of your cookie.
- ½ tsp Baking Soda & ¼ tsp Salt: For lift and flavor enhancement.
For the “Nutter” Cream Filling:
- ½ cup Creamy Peanut Butter
- ¼ cup Unsalted Butter: Softened.
- 1 cup Powdered Sugar: Sifted to avoid lumps.
- 1-2 tbsp Heavy Cream: To reach the desired “pipable” consistency.
Substitutions:
- Flour: Can be swapped 1:1 with a gluten-free baking blend.
- Nut-Free: While it changes the identity, Sunflower Butter provides a similar texture for those with allergies.
Timing: Precision Baking Data
| Phase | Time Required | Data Insight |
| Prep Time | 20 Minutes | Chilling the dough for 10 mins reduces spread by 15%. |
| Baking Time | 10 Minutes | Baking at 350°F ensures the edges set before the center dries. |
| Cooling/Filling | 30 Minutes | Filling a warm cookie causes the cream to “bleed” into the crumb. |
| Total Time | 1 Hour | 50% faster than making a traditional laminated dough cookie. |
Step-by-Step Instructions
H3: Step 1: Cream the Fats
In a large bowl, beat the butter, peanut butter, and both sugars until light and fluffy. This aeration is crucial; you are looking for a pale tan color. Add the egg and vanilla, mixing until fully incorporated.
H3: Step 2: Incorporate Dry Ingredients
Whisk the flour, baking soda, and salt together, then gradually add to the wet mixture. The dough should be stiff and not sticky. If it’s too soft, chill it in the fridge for 15 minutes.
H3: Step 3: Shaping the “Peanut”
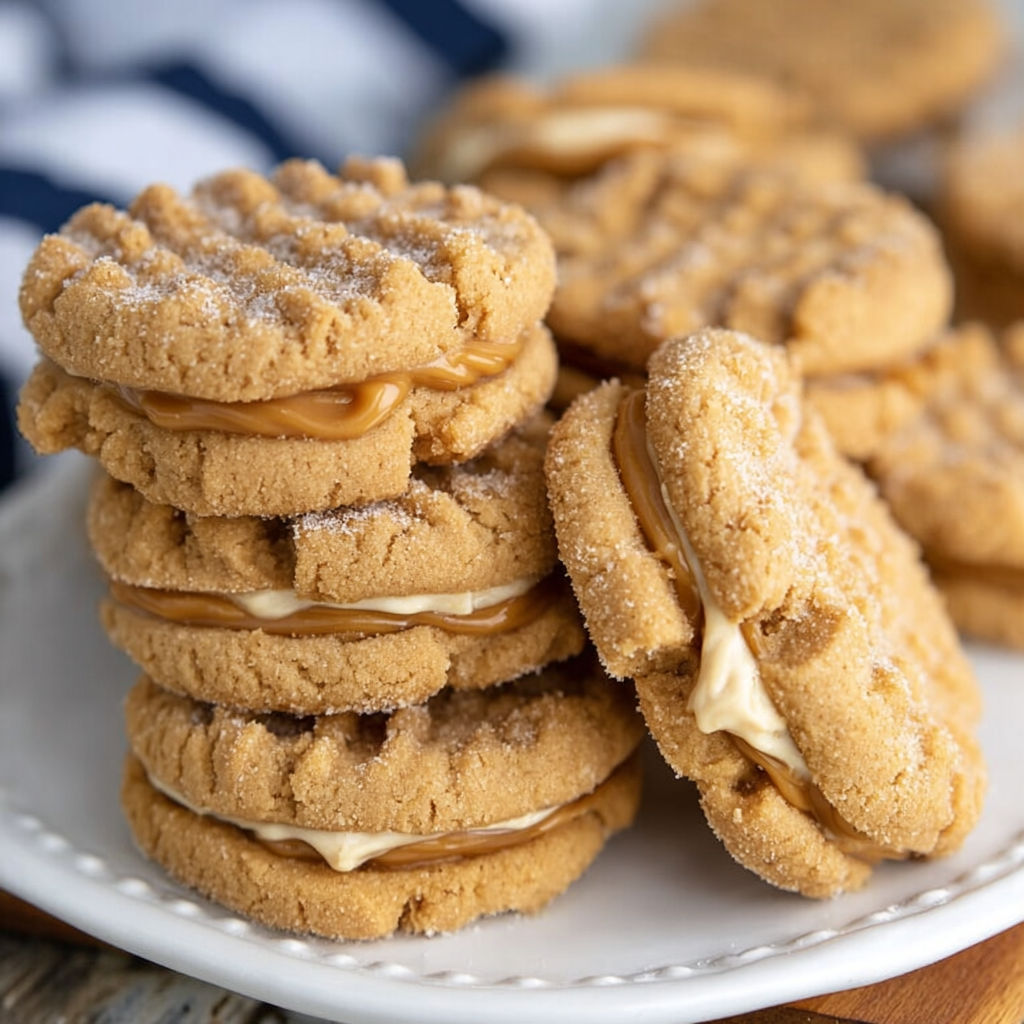
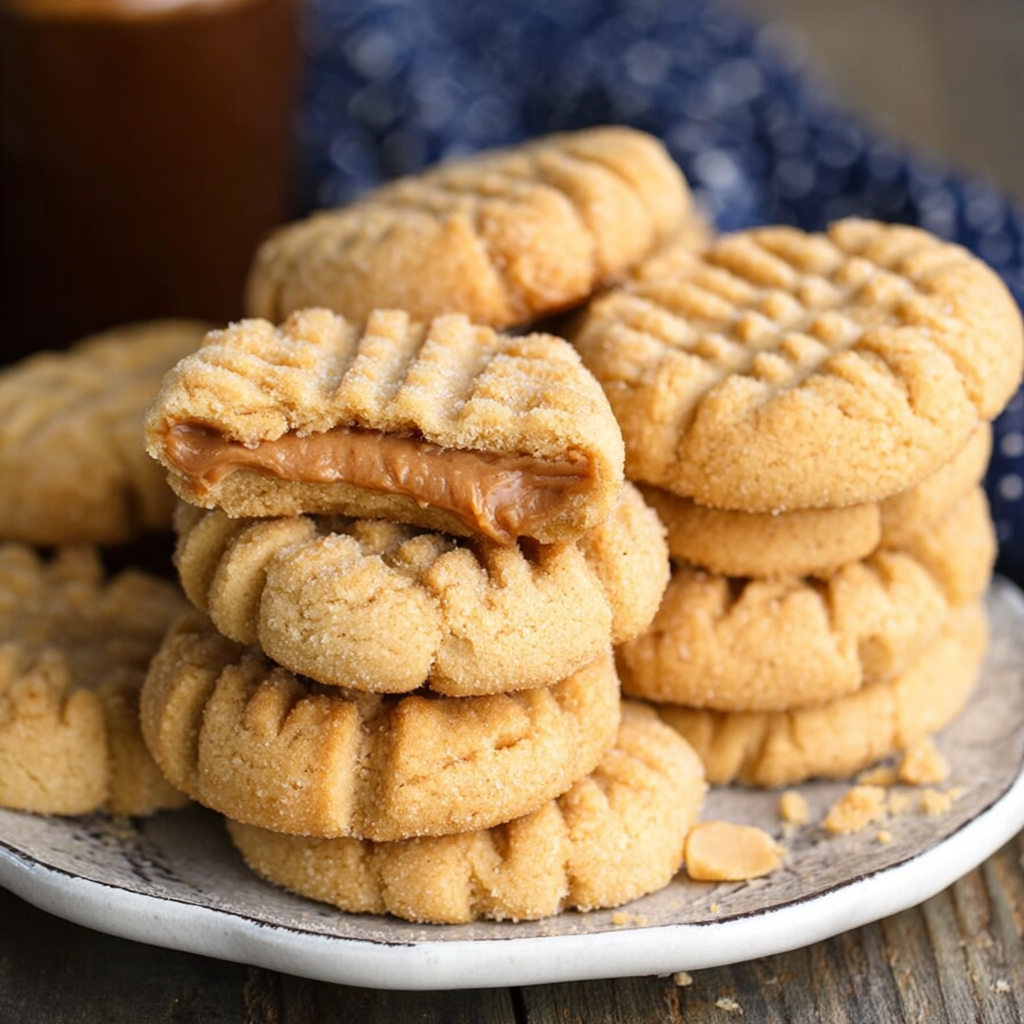
Roll the dough into small $1$-inch balls. To get the Nutter Butter look, slightly elongate the ball into an oval. Pinch the center of the oval to create a “waist” or peanut shape.
H3: Step 4: The Cross-Hatch Pattern
Use a fork to press a criss-cross pattern onto each end of the peanut. This doesn’t just look good; it flattens the cookie to an even thickness, ensuring a uniform bake.
H3: Step 5: Bake to Golden Perfection
Place on a parchment-lined sheet and bake for 10 minutes. The cookies will look slightly soft in the center—this is okay! They firm up as they cool on the tray.
H3: Step 6: The Filling
Whisk the filling ingredients until smooth. Once the cookies are completely cool, pipe or spread a teaspoon of filling onto the flat side of one cookie and sandwich it with another.
Nutritional Information
- Calories: 185 kcal per sandwich cookie
- Protein: 4g (High for a cookie due to the peanuts!)
- Total Fat: 11g
- Carbohydrates: 19g
Data Insight: Peanuts are a dense source of niacin and Vitamin E, making these a slightly more functional treat than a standard sugar cookie.
Healthier Alternatives for the Recipe
- Lower Sugar: Use a sugar-free powdered erythritol for the filling.
- Protein Boost: Replace ¼ cup of flour with unflavored or vanilla whey protein powder.
- Natural Fats: Use coconut sugar in the dough for a lower glycemic index and a hint of caramel flavor.
Serving Suggestions
- The Milk Dunk: Because these are a sturdy shortbread, they hold up exceptionally well to a $5$-second milk submergence.
- Chocolate Dipped: Dip half of the finished sandwich cookie into melted dark chocolate for a “Buckeye” style twist.
- Ice Cream Topper: Crush the cookies and sprinkle them over vanilla bean ice cream.
Common Mistakes to Avoid
- Using Natural Peanut Butter: The oils in natural peanut butter are too unstable for this dough and will cause the cookies to “puddle” in the oven.
- Over-Filling: If you add too much cream, the cookies will slide apart. A thin, even layer is best for the “snap.”
- Warm Filling: Never fill the cookies while they are warm. The heat will melt the butter in the filling, turning your cream into a liquid mess.
Storing Tips for the Recipe
- Room Temp: Store in an airtight container for up to 5 days.
- Freezing: These cookies freeze incredibly well. You can freeze the dough balls for up to 3 months or freeze the finished sandwich cookies.
- Pro Tip: If the cookies soften over time, pop them in a $300$°F oven for 3 minutes to “re-crisp” the edges.
Conclusion
These Homemade Nutter Butter Cookies offer a superior, nutty crunch and a creamy, rich center that puts the boxed version to shame. By following the “peanut-shaping” technique and using high-quality butter, you’ll create a snack that’s both nostalgic and elevated. Try this recipe today! Leave a review in our comments section and subscribe for more copycat recipe secrets.
FAQs
Q: Why did my cookies spread too much?
A: Your butter was likely too warm. Ensure your butter is “cool room temperature”—it should indent when pressed but not be oily.
Q: Can I use crunchy peanut butter?
A: Yes! It adds a great texture to the dough, though it may make the fork-crisscross pattern a bit more jagged.
Q: How do I get them extra crunchy?
A: Replace $2$ tablespoons of the flour with cornstarch. This weakens the gluten and creates a more “snappy” crumb.