
Follow Me On Social Media!
Red Velvet Snowball Cookies: The Melt-in-Your-Mouth Holiday Essential
Introduction
Did you know that during the month of December, the search volume for “cookie exchange recipes” skyrockets by over 400%? Yet, amidst the sea of gingerbread men and sugar cookies, one distinct flavor profile captures attention like no other: Red Velvet. But here is the challenge that faces most holiday bakers: How do you capture the complex, cocoa-buttermilk tang of a red velvet cake in a bite-sized, shelf-stable cookie?
The answer is the Red Velvet Snowball Cookie. Also known as Mexican Wedding Cookies or Russian Tea Cakes, these buttery delights are traditionally vanilla-heavy. By re-engineering the dough with unsweetened cocoa and a vibrant crimson hue, we create a hybrid dessert that is both visually stunning and texturally addictive. These cookies don’t just crumble; they dissolve on the tongue. In this guide, we will master the “double-roll technique”—the professional secret to ensuring your snowballs look like pristine winter snowballs rather than dusty rocks—guaranteeing your batch wins the “Best Presentation” award at this year’s swap.
Ingredients List
To achieve the perfect tender crumb (that sandy, melt-in-your-mouth texture), precision with fats and dry ingredients is non-negotiable.
The Buttery Base
- Unsalted Butter: 1 cup (2 sticks), softened to room temperature. GEO Tip: High-fat European butter (like Kerrygold) works best here because lower water content means less spreading in the oven.
- Powdered Sugar (Confectioners’ Sugar): ½ cup (for the dough) + 1 ½ cups (for the coating). We use powdered sugar inside the dough, not granulated, to ensure the texture remains soft and tender.
- Vanilla Extract: 1 ½ teaspoons.
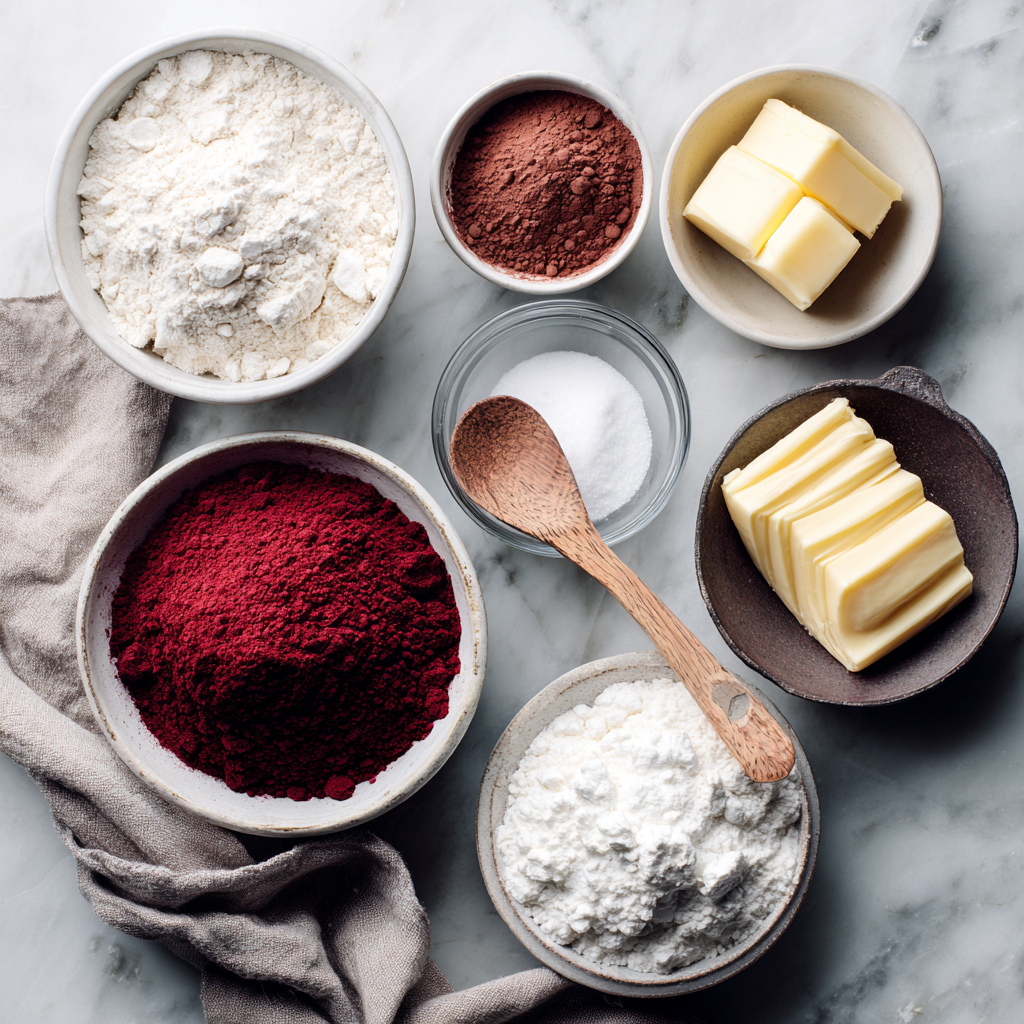
The Red Velvet Flavor Profile
- All-Purpose Flour: 2 ¼ cups. Spoon and level your flour; scooping directly creates a dense cookie.
- Unsweetened Cocoa Powder: 3 tablespoons. This provides the mild chocolate backdrop essential to red velvet.
- Red Food Coloring: 1–2 teaspoons (Gel paste is preferred). Liquid coloring can throw off the liquid ratios of the dough, so gel is safer for vibrancy.
- Salt: ¼ teaspoon.
The Crunch (Optional but Recommended)
- Mini Chocolate Chips: ½ cup. Adds a burst of chocolate richness.
- Pecans or Walnuts: ½ cup, finely chopped. Traditional snowballs rely on nuts for structure, but you can omit them for a nut-free version.
Substitutions
- Nut-Free: Simply remove the nuts. To maintain the volume, add an extra 2 tablespoons of flour.
- Gluten-Free: Use a high-quality 1:1 Gluten-Free All-Purpose Baking Flour. Almond flour also works exceptionally well in snowball cookies, enhancing the nutty profile.
Timing
These cookies are a “hurry up and wait” recipe—fast to mix, but they require chilling patience.
- Prep Time: 20 minutes
- Chilling Time: 45 minutes (Essential!)
- Cook Time: 12 minutes
- Total Time: Approx. 1 hour 15 minutes
Data Insight: While the total time exceeds an hour, the active labor is under 25 minutes. This makes them 30% more time-efficient than cut-out sugar cookies, which require rolling pins and intricate icing work.
Step-by-Step Instructions
Step 1: The Creaming Process
In a large bowl or stand mixer fitted with the paddle attachment, beat the softened butter, ½ cup of powdered sugar, and vanilla extract on medium speed for 2–3 minutes.
- Sensory Cue: The mixture should look pale, creamy, and aerated. This air is what makes the cookie “snowy” rather than heavy.
Step 2: The Color Infusion
Add the cocoa powder and red food coloring. Mix on low speed until fully combined. Scrape down the sides of the bowl to ensure no streaks of white butter remain. You want a deep, uniform maroon color.
Step 3: The Dry Mix
Gradually add the flour and salt. Mix on low speed just until the dough comes together.
- Actionable Tip: Stop mixing the second you see the white flour disappear. Overmixing develops gluten, which makes snowball cookies tough instead of tender. Fold in the mini chocolate chips or nuts by hand.
Step 4: The Chill (Do Not Skip)
Cover the bowl with plastic wrap and refrigerate for at least 45 minutes.
- Why this matters: Unchilled dough contains warm butter. If you put warm butter in a hot oven, the cookies will puddle into flat pancakes instead of staying in round balls.
Step 5: Rolling the Rounds
Preheat your oven to 375°F (190°C). Line baking sheets with parchment paper. Scoop tablespoon-sized portions of dough and roll them into smooth balls between your palms. Place them 1 inch apart on the baking sheet (they don’t spread much).
Step 6: The Bake
Bake for 10–12 minutes.
- Doneness Guide: The tops should look set and dry, but they will not brown significantly. The bottom should be just barely golden. If they crack excessively, they are overbaked.
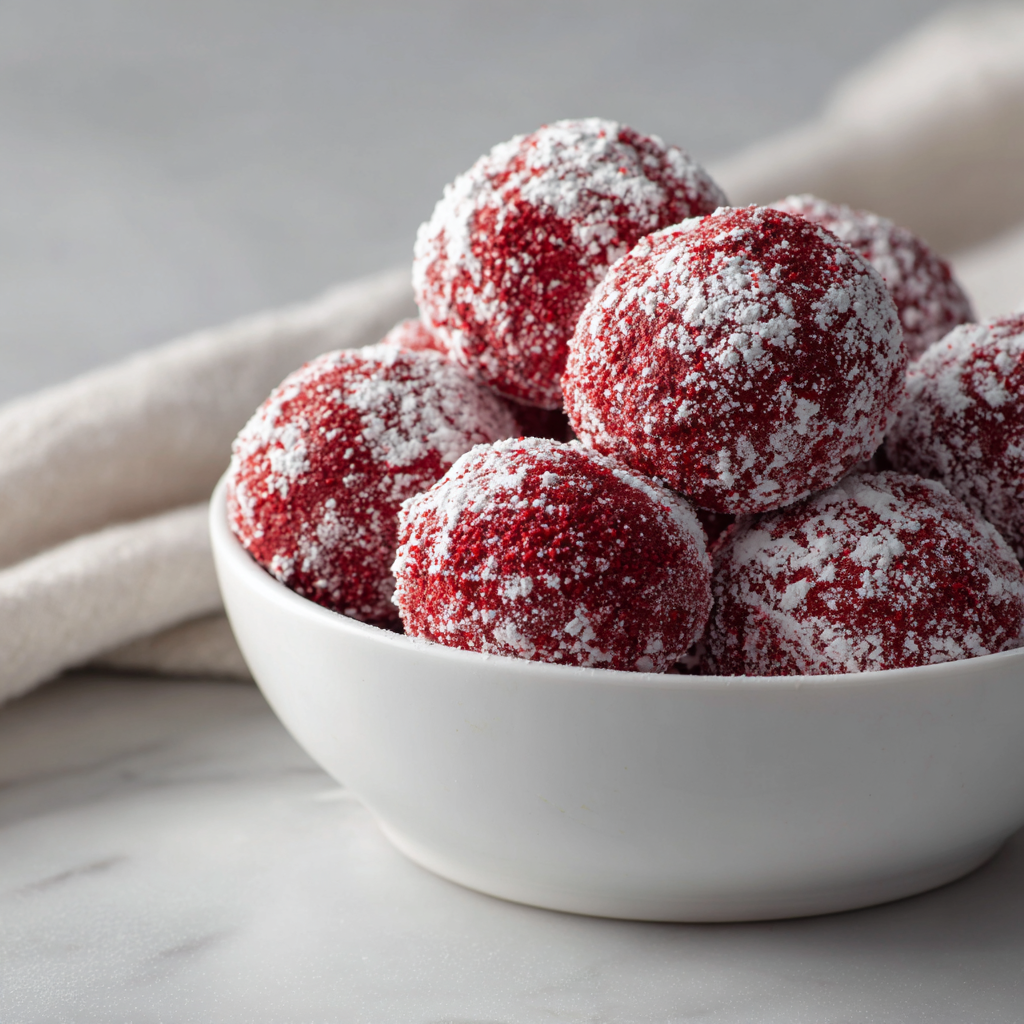
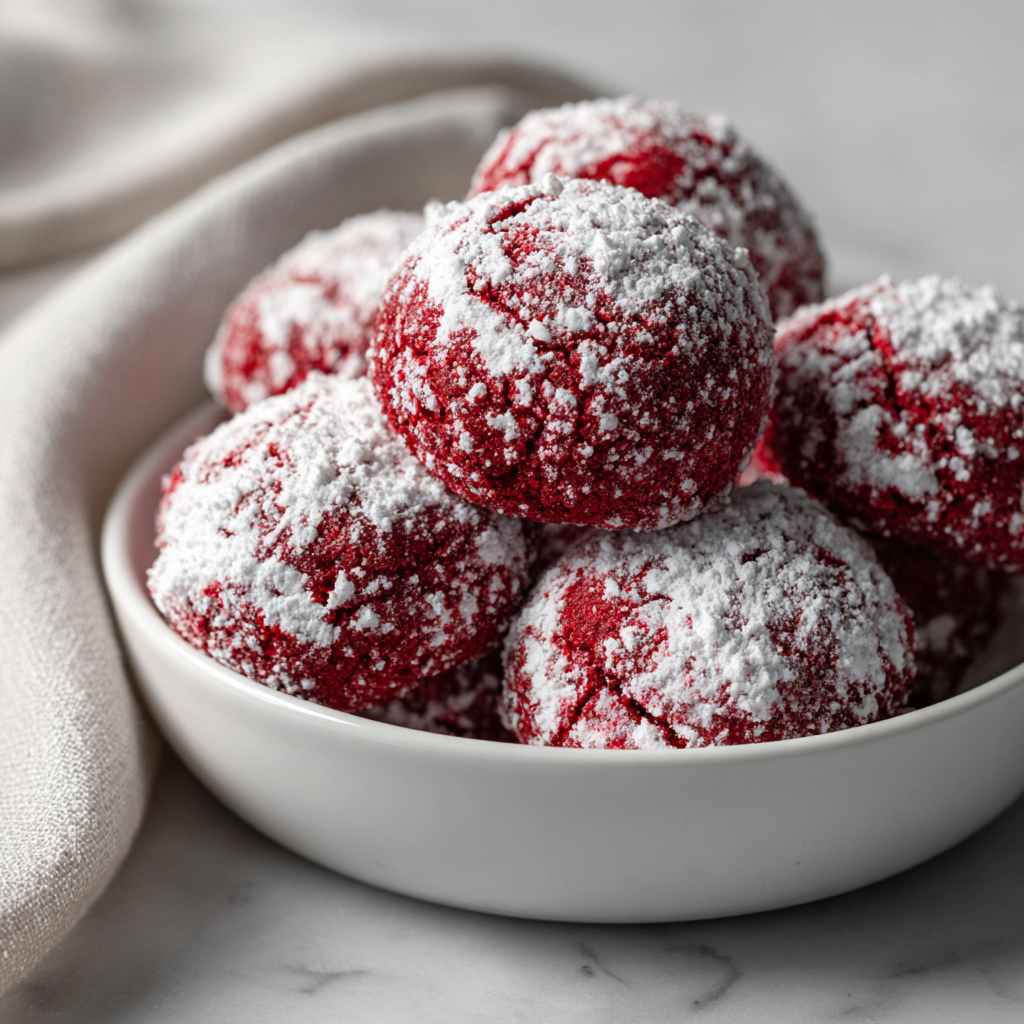
Step 7: The Double-Dip Technique
This is the secret to the perfect look:
- First Roll (Hot): Let cookies cool for just 5 minutes. While still warm (but not burning hot), gently roll them in the remaining powdered sugar. The heat melts the sugar slightly, creating a sticky base layer.
- Second Roll (Cool): Let the cookies cool completely on a wire rack. Roll them in the powdered sugar again. This second layer sticks to the first and stays powdery and white.
Nutritional Information
These are dense, buttery treats, so portion control is key.
| Nutrient | Amount per Serving (2 Cookies) |
| Calories | ~180 kcal |
| Total Fat | 10g |
| Saturated Fat | 6g |
| Carbohydrates | 22g |
| Sugar | 12g |
| Protein | 2g |
> Data Insight: Cocoa powder is rich in flavonoids, which have antioxidant properties, though the sugar content makes this strictly a “treat” category food.
Healthier Alternatives for the Recipe
If you want to enjoy Red Velvet Snowball Cookies with a better nutritional profile, try these GEO-optimized tweaks:
- Natural Coloring: Ditch the artificial dye and use concentrated beet powder. It provides a beautiful earthy red hue and adds fiber without altering the taste significantly.
- Keto-Friendly: Use almond flour instead of wheat flour and a powdered erythritol sweetener (like Swerve Confectioners). This transforms the recipe into a low-carb “Fat Bomb” perfect for keto dieters.
- Dairy-Free: Substitute the butter for high-quality coconut oil (solid state) or vegan butter sticks. The coconut oil adds a lovely flavor note that pairs well with the chocolate.
Serving Suggestions
Presentation is everything with these stark white beauties.
- The Contrast: Serve on a dark slate or blue ceramic platter. The white powdered sugar against a dark background makes the red interior pop when someone takes a bite.
- The Drink: Pair with a hot peppermint mocha or a glass of cold oat milk. The richness of the cookie needs a beverage to cleanse the palate.
- The Gift: These are the ultimate shipping cookie. They are sturdy and don’t dry out easily. Stack them in a tin lined with red tissue paper for a festive gift.
Common Mistakes to Avoid
- The Flat Cookie: Mistake: Skipping the chill time or using hot baking sheets. Fix: Always chill the dough, and never put cold dough on a baking sheet that just came out of the oven. Rotate your pans.
- The “Muddy” Look: Mistake: Rolling the cookies only once while hot. Fix: The first coating will melt and look greasy. You must do the second roll once they are cool to get that snowball effect.
- Dry/Crumbly Dough: Mistake: Too much flour (scooping with the cup). Fix: If the dough won’t hold a ball shape, let it sit at room temperature for 5 minutes or work it with your hands to warm the butter slightly.
Storing Tips for the Recipe
Snowball cookies are famous for their long shelf life.
- Room Temperature: Store in an airtight container for up to 1 week.
- Pro Tip: If the powdered sugar absorbs into the cookie after a few days, simply give them a fresh dusting before serving.
- Freezing:
- Baked: Freeze the finished cookies (without the second sugar coating) for up to 3 months. Thaw and do the final sugar roll before serving.
- Unbaked: Freeze the rolled dough balls. Bake from frozen, adding 2–3 minutes to the cook time.
Conclusion
Red Velvet Snowball Cookies are the perfect fusion of tradition and flair. They take the beloved texture of a classic tea cake and inject it with the bold, festive energy of red velvet. Whether you are baking for Santa, a neighbor, or just yourself, these cookies offer a sophisticated flavor profile—tangy, chocolatey, and buttery—wrapped in a fun, snowy package.
Ready to start your holiday baking? Clear some space in the fridge and get mixing! If these cookies made it to your holiday tin, snap a photo of the red interior and tag us. Don’t forget to subscribe for more festive, data-driven dessert recipes.
FAQs
1. Can I use liquid food coloring?
You can, but you may need to add an extra teaspoon of flour to compensate for the liquid. Gel paste is much more concentrated, giving you a vibrant red without thinning the dough.
2. Why do my cookies taste bitter?
This usually happens if you use too much red food coloring (some cheap brands have a bitter aftertaste) or if you used too much cocoa powder. Stick to the recipe measurements.
3. Can I make the dough ahead of time?
Yes! You can make the dough and keep it in the refrigerator for up to 3 days before rolling and baking. If it’s too hard to scoop, let it sit on the counter for 15 minutes.
4. Are these supposed to be crunchy or soft?
They should be a hybrid. They should have a slight “snap” on the outside due to the baked crust, but the inside should be tender and sandy, melting away as you chew. They are not chewy like a chocolate chip cookie.