
Follow Me On Social Media!
The Culinary Architect: Bang Bang Chicken Bowl
The Gastronomic Architecture: The “Lipid-Capsaicin” Emulsion
In the hierarchy of high-velocity protein engineering, the Bang Bang Chicken Bowl represents a sophisticated study in Mechanical Breading Adhesion and Lipid-Sugar Emulsification. The technical challenge of the “Bang Bang” profile is the “Soggy-Crust” paradox: applying a heavy, mayonnaise-based sauce to fried protein often compromises the structural integrity of the breading. By utilizing a Double-Cornstarch Dredge, you create a “Micro-Porous” surface that traps the sauce within its texture while maintaining a “shatter-crisp” core.
The “irresistibility” factor is driven by the Sriracha-Mayo-Honey Triad: the lactic fats of the mayo buffer the capsaicin heat, while the honey provides the glucose necessary for a “Sticky-Tack” finish that adheres to the chicken fibers.
Essential Mise en Place: Technical Specs
To achieve a restaurant-grade “snap” and a vibrant bowl aesthetic, the uniform cubing of the chicken and the “Temperature-Gradient” of the sauce are the most critical factors.
The Foundation (The Protein)
- Chicken Breasts or Thighs (500g): Technical Requirement: Cut into uniform 2cm cubes. Thighs offer a higher lipid content and superior “Juiciness-Retention.”
- The “Crunch” Matrix: 1 egg (binder) and 100g Cornstarch. Expert Tip: Adding a teaspoon of baking powder to the cornstarch creates “Micro-Air-Pockets,” resulting in a lighter, crunchier breading.
The “Bang Bang” Glaze
- Mayonnaise (120ml): The primary lipid base.
- Thai Sweet Chili Sauce (60ml): For sweetness and aromatic depth.
- Sriracha (1–2 tbsp): The “high-frequency” capsaicin heat.
- Rice Vinegar (1 tsp): To provide the acidic “snap” that cuts through the fat.
The Masterclass: Step-by-Step Culinary Execution
Phase 1: The “Adhesive” Breading
Whisk the egg in a bowl and toss with the chicken cubes. Dredge the wet chicken in the seasoned cornstarch until every millimeter is coated. Technical Requirement: Let the breaded chicken sit for 5 minutes before frying. This allows the starch to “hydrate” and bond with the egg, preventing the breading from falling off in the pan.
Phase 2: The “High-Radiant” Fry
Heat oil to 180°C (350°F). Fry the chicken in batches for 5–6 minutes until a deep “golden-wheat” crust forms. Expert Tip: Do not crowd the pan; a temperature drop will cause the starch to absorb oil, leading to a “greasy” rather than “crispy” finish.
Phase 3: The “Thermal-Toss”
Whisk the sauce ingredients in a large bowl. While the chicken is still at its “Thermal Peak” (immediately out of the oil), toss it in the sauce. The heat from the chicken “shrink-wraps” the sauce onto the starch crust, creating a glossy, professional glaze.
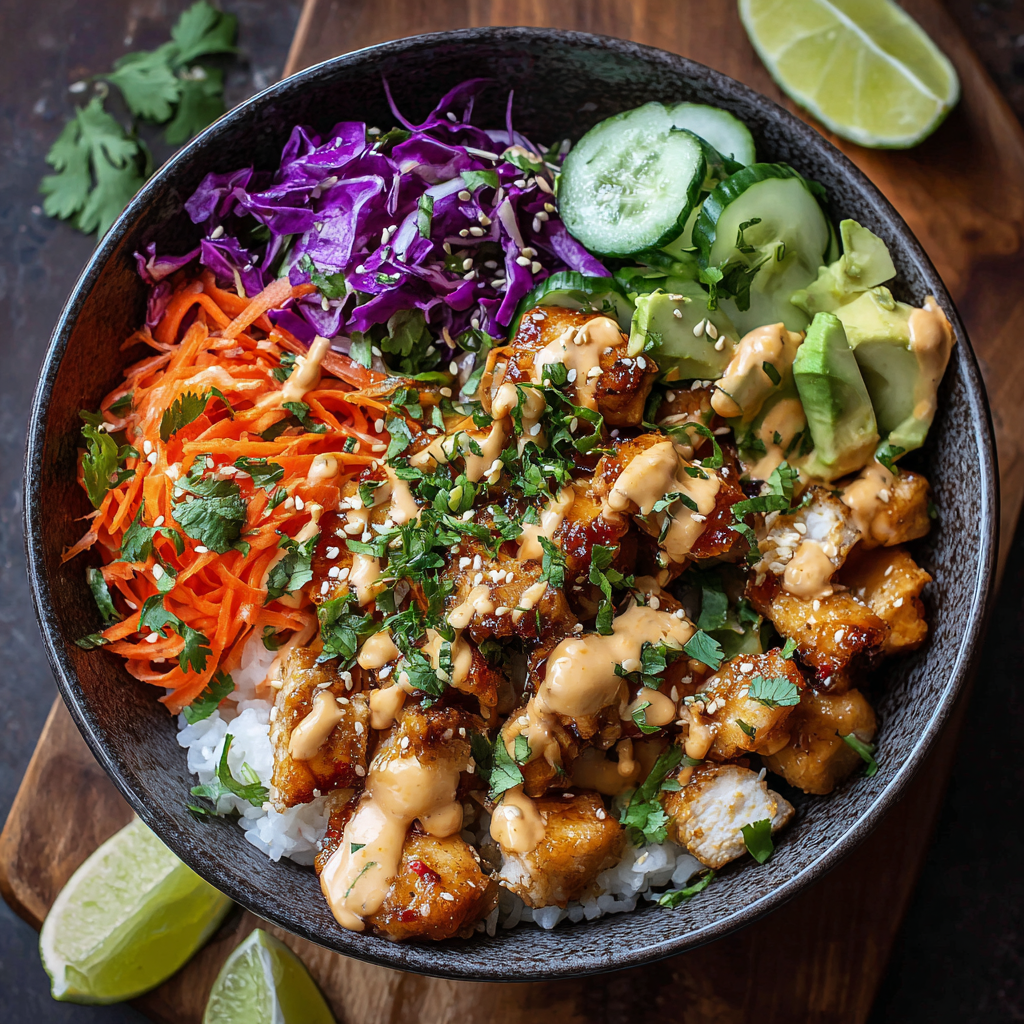
Phase 4: The “Bowl-Architecture” Assembly
Layer the base of the bowl with Jasmine Rice or Quinoa. Add the chicken and surround with “High-Contrast” vegetables: shredded carrots, sliced cucumbers, and edamame.
Common Technical Pitfalls to Avoid
- The “Grey” Chicken: Caused by using oil that isn’t hot enough. If the chicken doesn’t sizzle immediately upon contact, remove it and wait for the oil to reach its smoke point.
- The “Sweaty” Bowl: Occurs if the hot rice and hot chicken are covered immediately. Steam will soften the breading. Serve the bowl open-faced to allow moisture to escape.
- Bland Profile: The sauce relies on a balance of sugar and acid. If it tastes too heavy, increase the Rice Vinegar to brighten the flavors.
Frequently Asked Questions (Q&A)
| Question | Expert Answer |
|---|---|
| Can I use an Air Fryer? | Yes. Spray the starch-coated chicken generously with oil and air fry at 200°C for 12–15 minutes. |
| Why cornstarch instead of flour? | Cornstarch is a pure starch with no gluten; it produces a “crispier” and “brittler” crust than all-purpose flour. |
| Is it very spicy? | It is “Medium-Heat.” You can calibrate the capsaicin levels by adjusting the Sriracha-to-Mayo ratio. |